Create a Vagrant stack
Introduction
This guide will help you create a Vagrant stack. A Vagrant stack will use your local machine to host your VM. Vagrant works by using virtual box on your local or remote machine to create VMs. Learn more about Vagrant here.
Requirements:
To create a Vagrant Stack you need to have Vagrant and VirtualBox installed. KD will take care of installing them for you.
It is recommended that you choose the Vagrant stack if you have access to a physical machine. Vagrant will not work on the below environments:
- Cloud VMs like GCE or EC2
- Windows (not yet supported, work in progress)
Step by Step guide
-
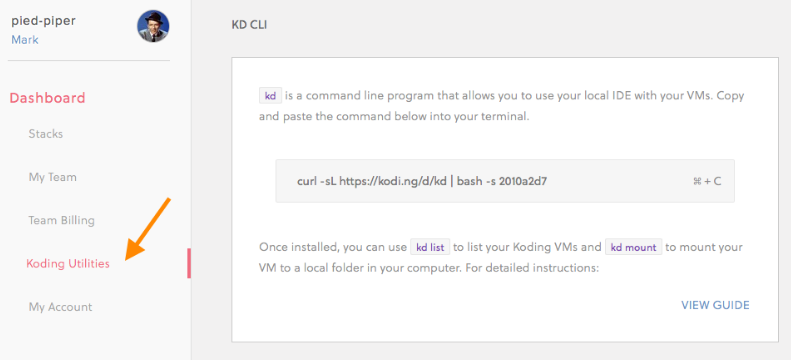
Install KD by copying the KD CLI command and pasting in your local terminal. Click Stacks -> Koding Utilities to find the KD CLI command
If you already have KD installed make sure you have the latest version by running sudo kd update in your local terminal.
-
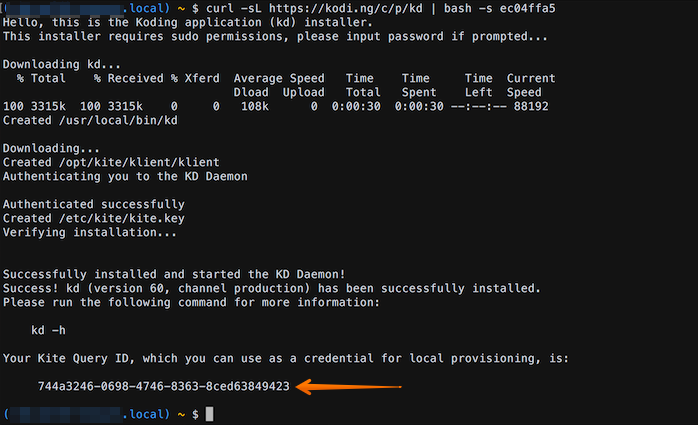
After the installation is successful on your local terminal , copy the Kite Query ID
If you already have the latest KD installed, you can run kd version on your local terminal to obtain your Kite Query ID.
-
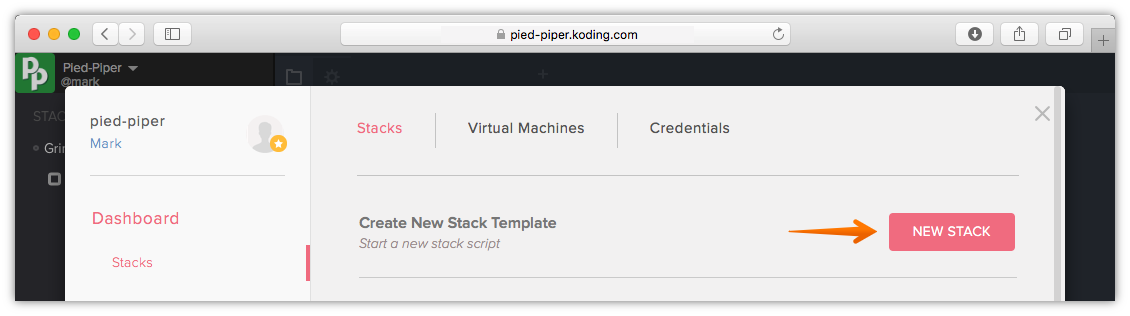
It’s time to create your Vagrant stack, go to Koding again and click STACKS

-
Click New Stack
-
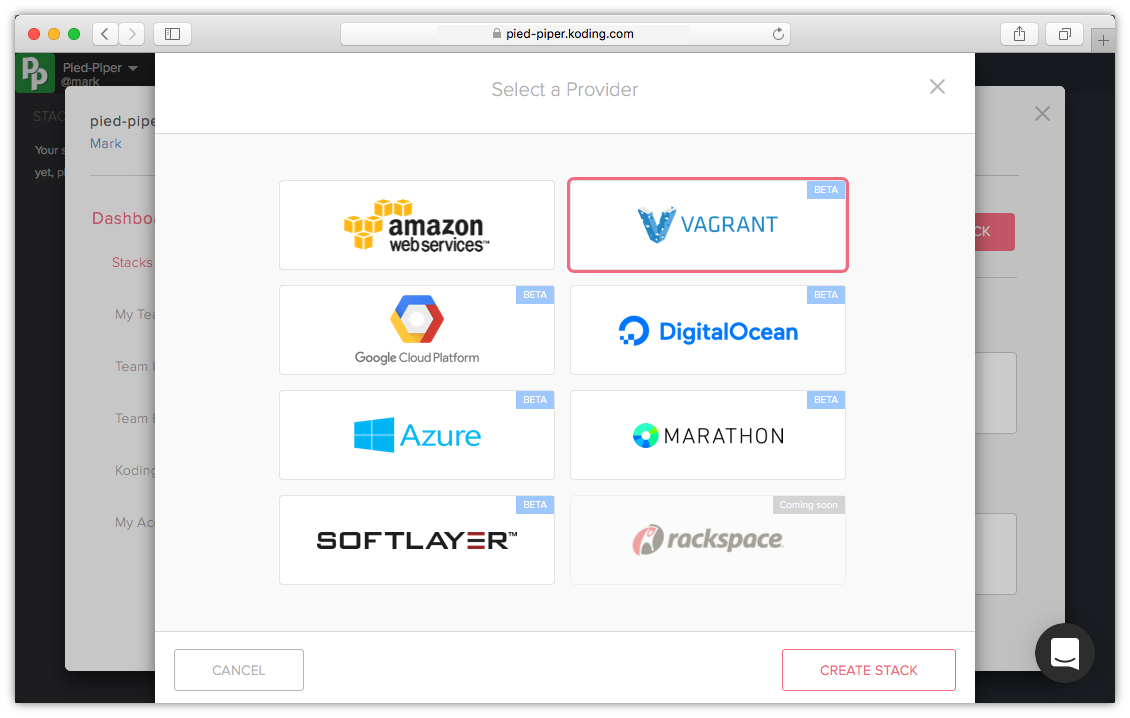
Choose Vagrant as the provider and click Create Stack
-
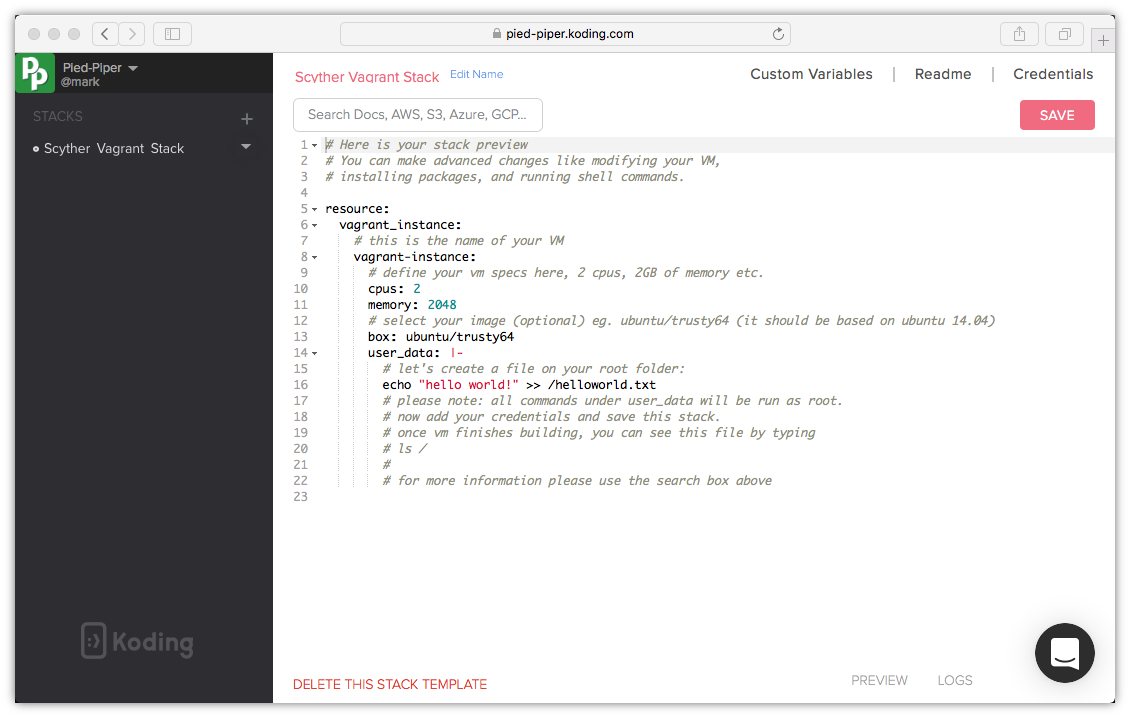
You will now see the default stack template for Vagrant. You can give your stack a name by clicking on the Edit Name on top beside your stack title. The three tabs represent:
- Custom variables: define custom variables to use in your stack template, hidden from Team members
- Readme: this text will be shown in a message box when your team starts to build this stack. You can add instructions or notes for your team to read
- Credentials: add your Vagrant credentials here
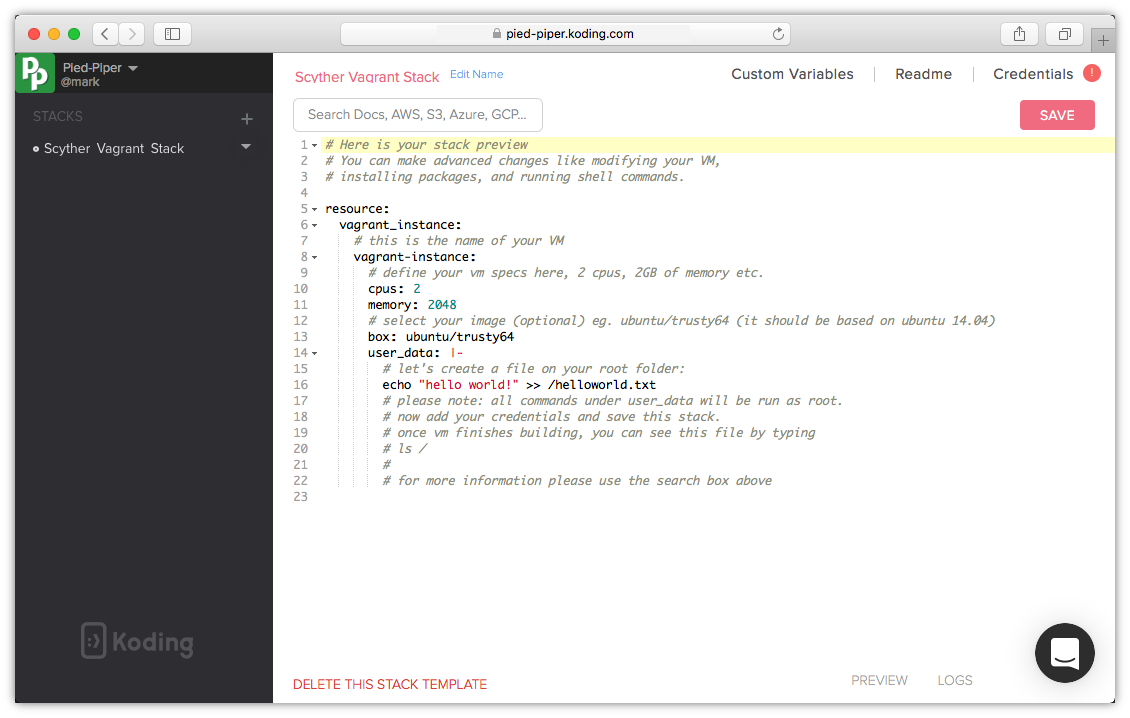 Review the Stack Template file to add/modify/remove any of your VM configurations
You can add commands to run once your VM starts under the user_data section. For example you can choose to install services/packages once a VM starts. Commands under the user_data section will run as
rootwhen the VM boots.Click on the stack name to return to your Stack template editor.
-
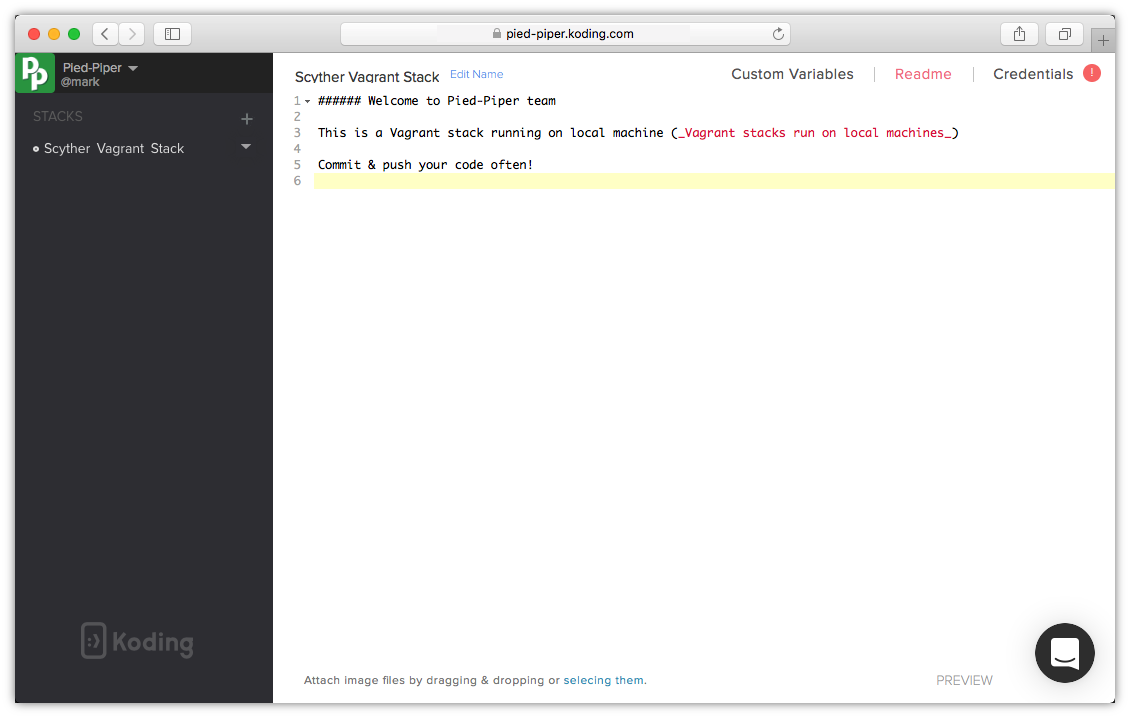
Edit your Readme section to greet your team and provide them with information or instructions. You can use markdown format
-
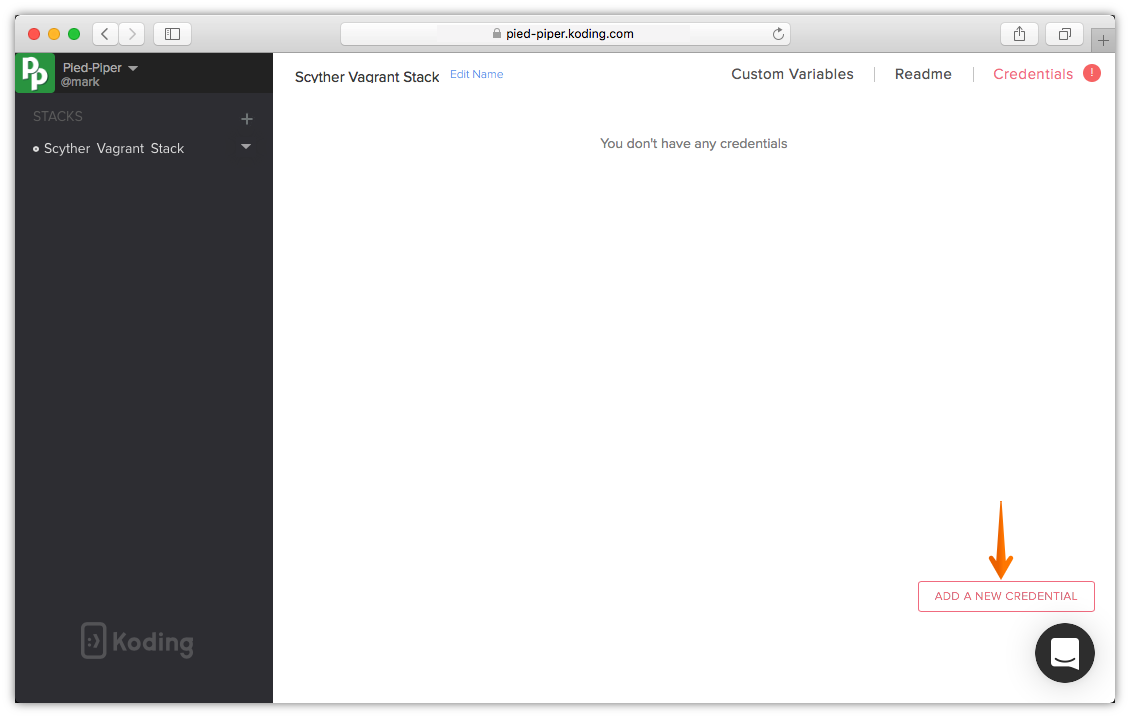
Go to the Credentials tab and click Add A New Credentials
-
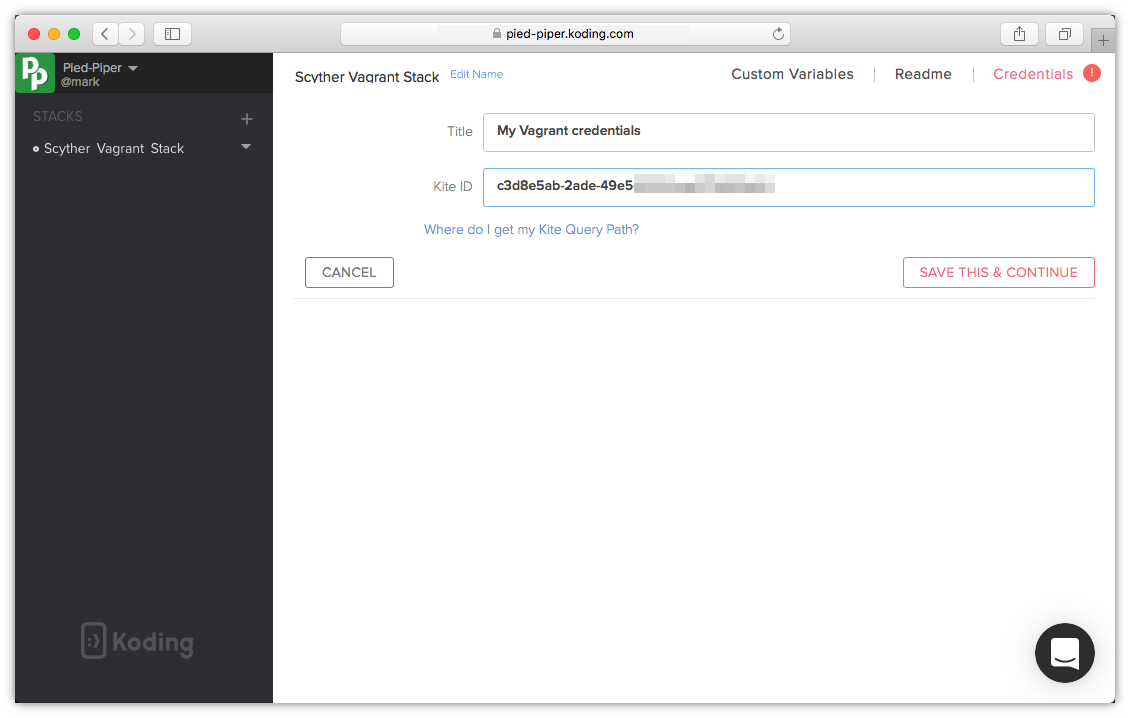
Give a Title to your Vagrant credentials, and paste the Kite Query ID you copied in step 2 into Kite ID. Then click SAVE THIS & CONTINUE.
-
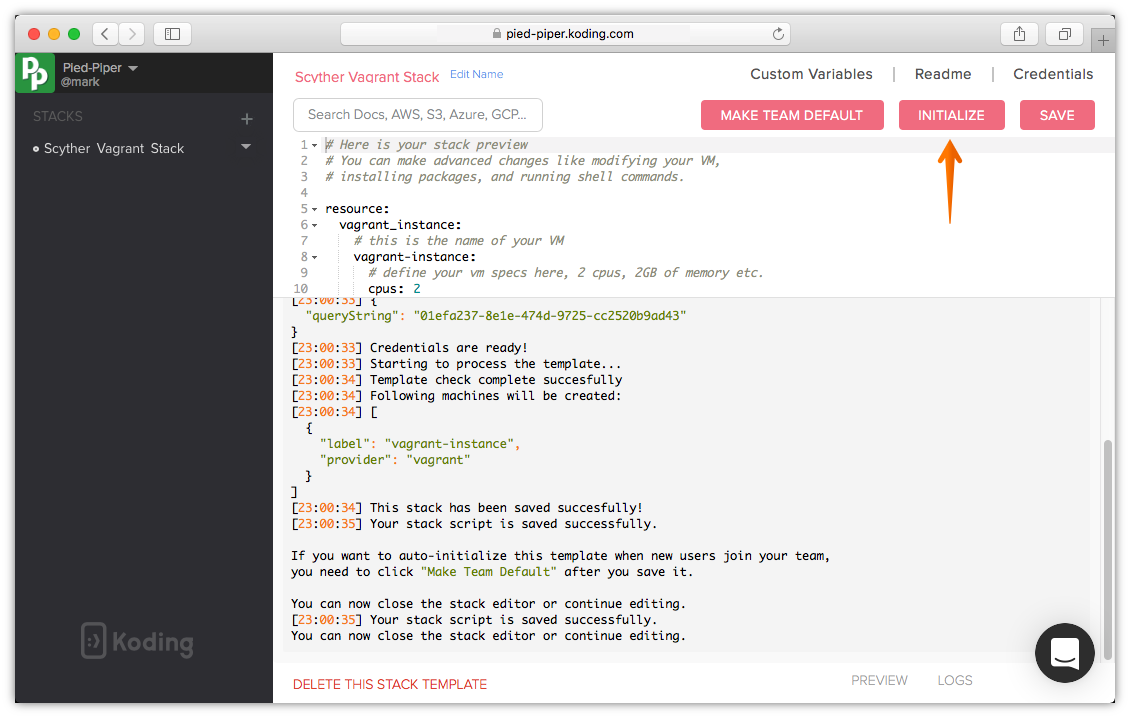
Your Vagrant credentials will be verified and you will be directed back to the Stack Template editor. Also the red exclamation mark that used to appear beside your Credentials tab should disappear. Click SAVE to save your stack and test your stack template file, it should save successfully
-
Click Initialize to initialize your stack
You can have multiple stacks within a team, click Make Team Default when you want to make this stack your team’s default stack.
-
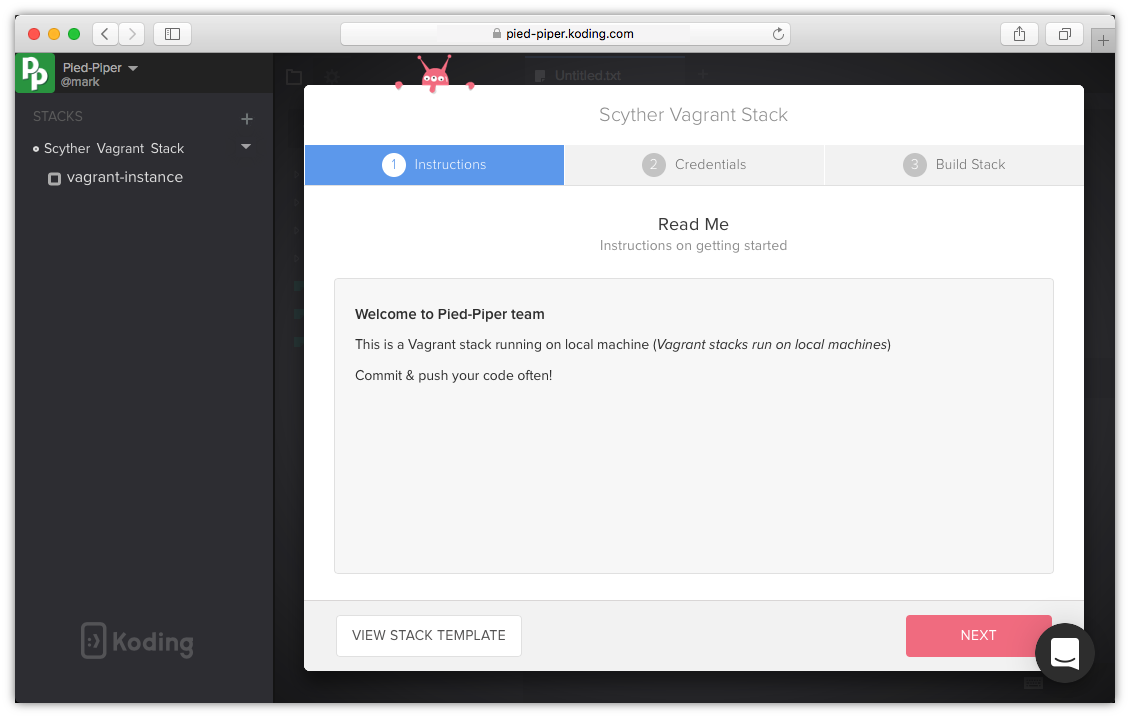
The build stack modal will appear, the Instructions tab will include the message you wrote in your Read Me tab. Click Next to continue
-
Click on Build Stack to start building your Stack
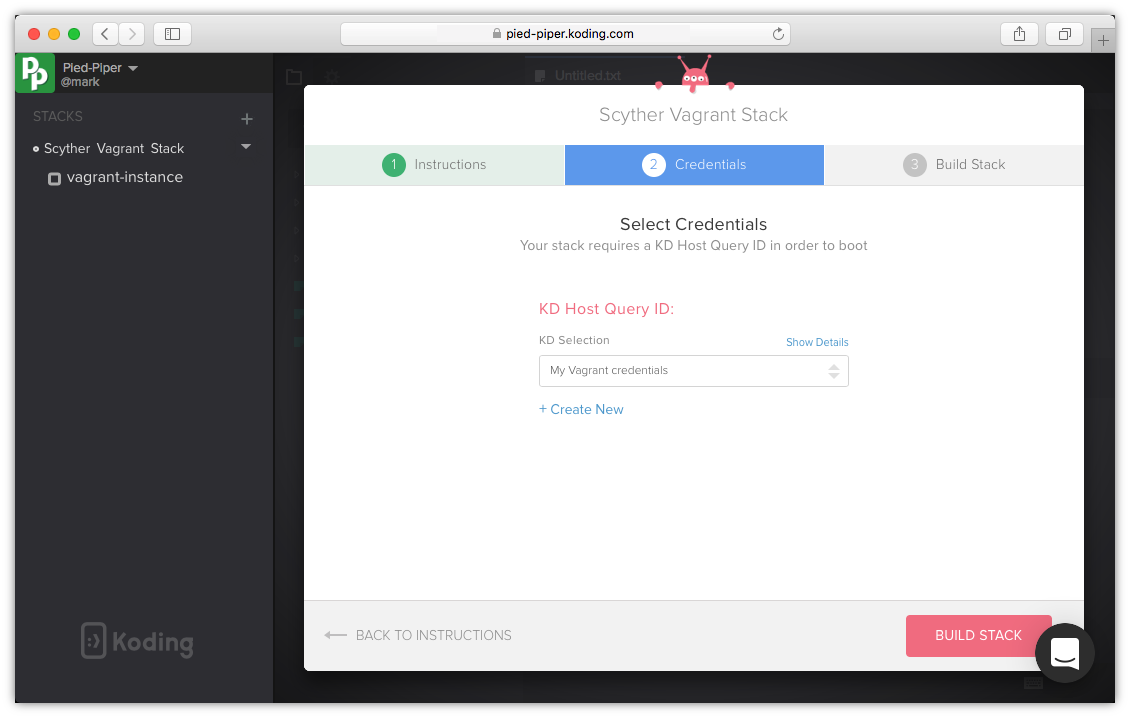
You can have multiple saved credentials to use within a team, the Credentials tab in your Build stack modal allows you to chose the one you want to use with this stack template.
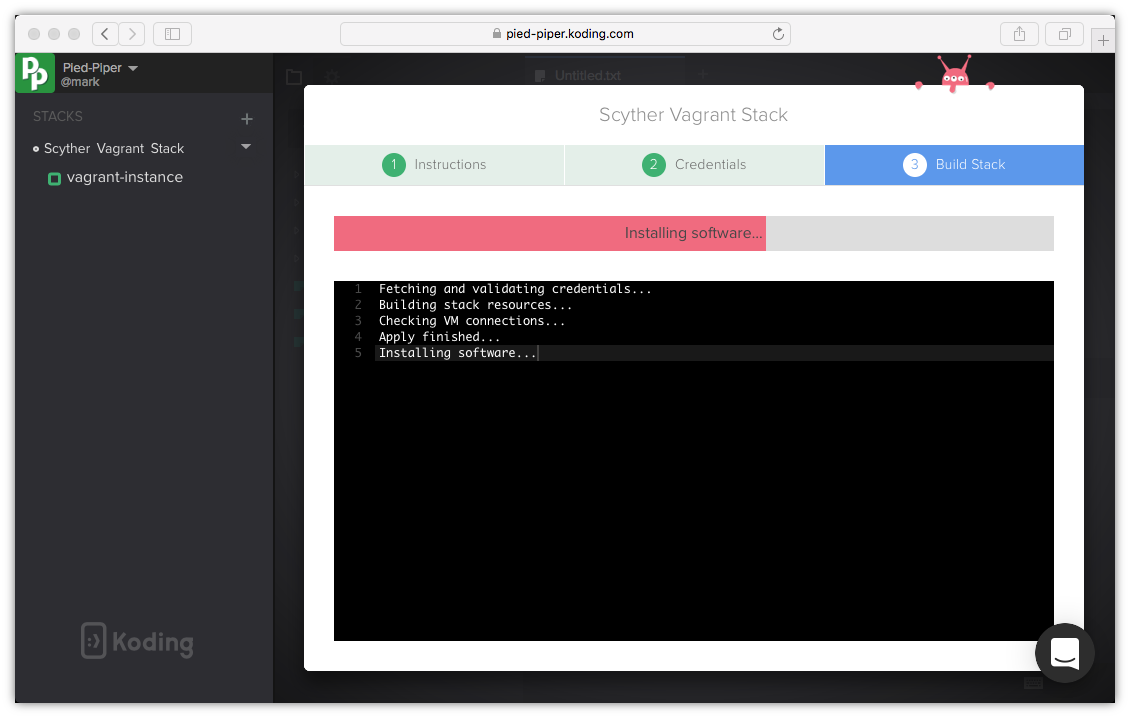
Your stack will start building..
-
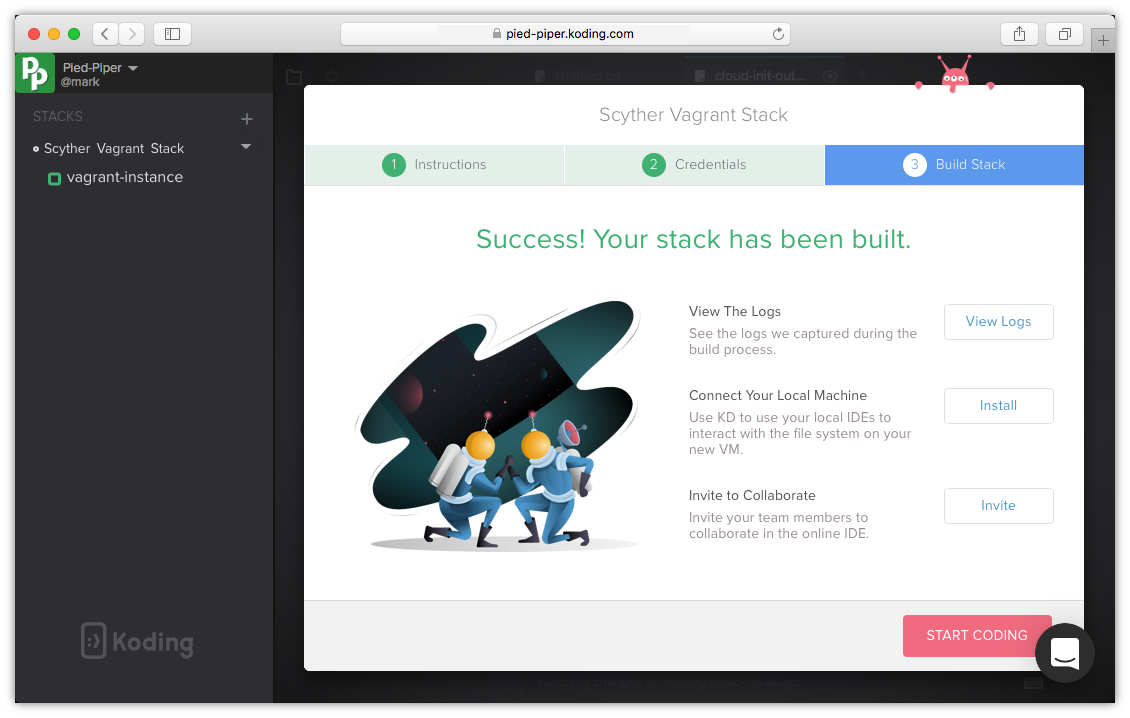
Your stack was successfully built. Click Start Coding to start using your new VM
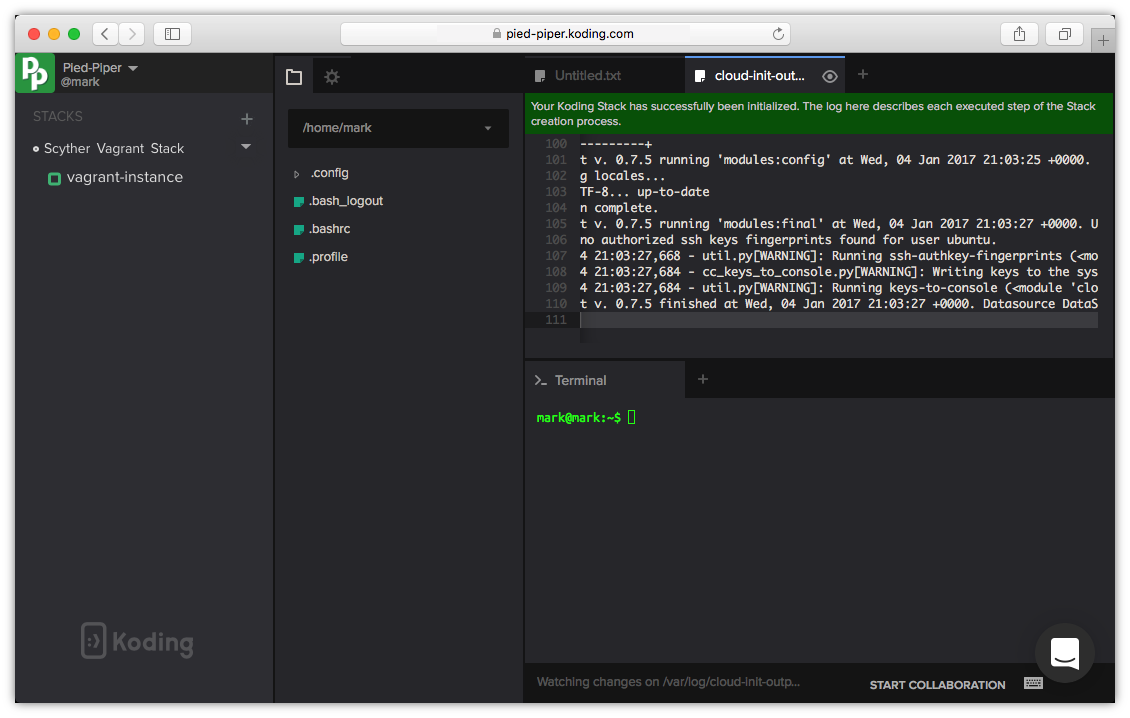
Congratulations, your new VM terminal is ready
Advanced notes regarding Vagrant Stack template
This is an example stack script with more configuration options that you can use with your Vagrant Stack
    # Here is your stack preview
    # You can make advanced changes like modifying your VM,
    # installing packages, and running shell commands.

    resource:
      vagrant_instance:
        localvm:
          cpus: 2
          memory: 2048
          box: ubuntu/trusty64
          debug: true
          forwarded_ports:
          # mysql:
          - host:  13306
            guest: 3306
          # postgres:
          - host:  15432
            guest: 5432
          user_data: |-
            sudo apt-get install mysql-server postgresql -y
- debug: true makes all the Vagrant output to be logged in
/Library/Logs/klient.log - forwarded_ports forwards specified port from guest to host