Create a Digital Ocean stack
Introduction
This guide will help you build Digital Ocean droplets stack. You can configure the number of droplets and applications installed on each instance. Along with configuring droplet size and region. Your new team members will be able to use your stack to build their VMs environment and start working from day one.
If you do not have a Digital Ocean account yet, you can signup here www.digitalocean.com
Step by step guide
-
Click ‘+’ sign to Create a New Stack

-
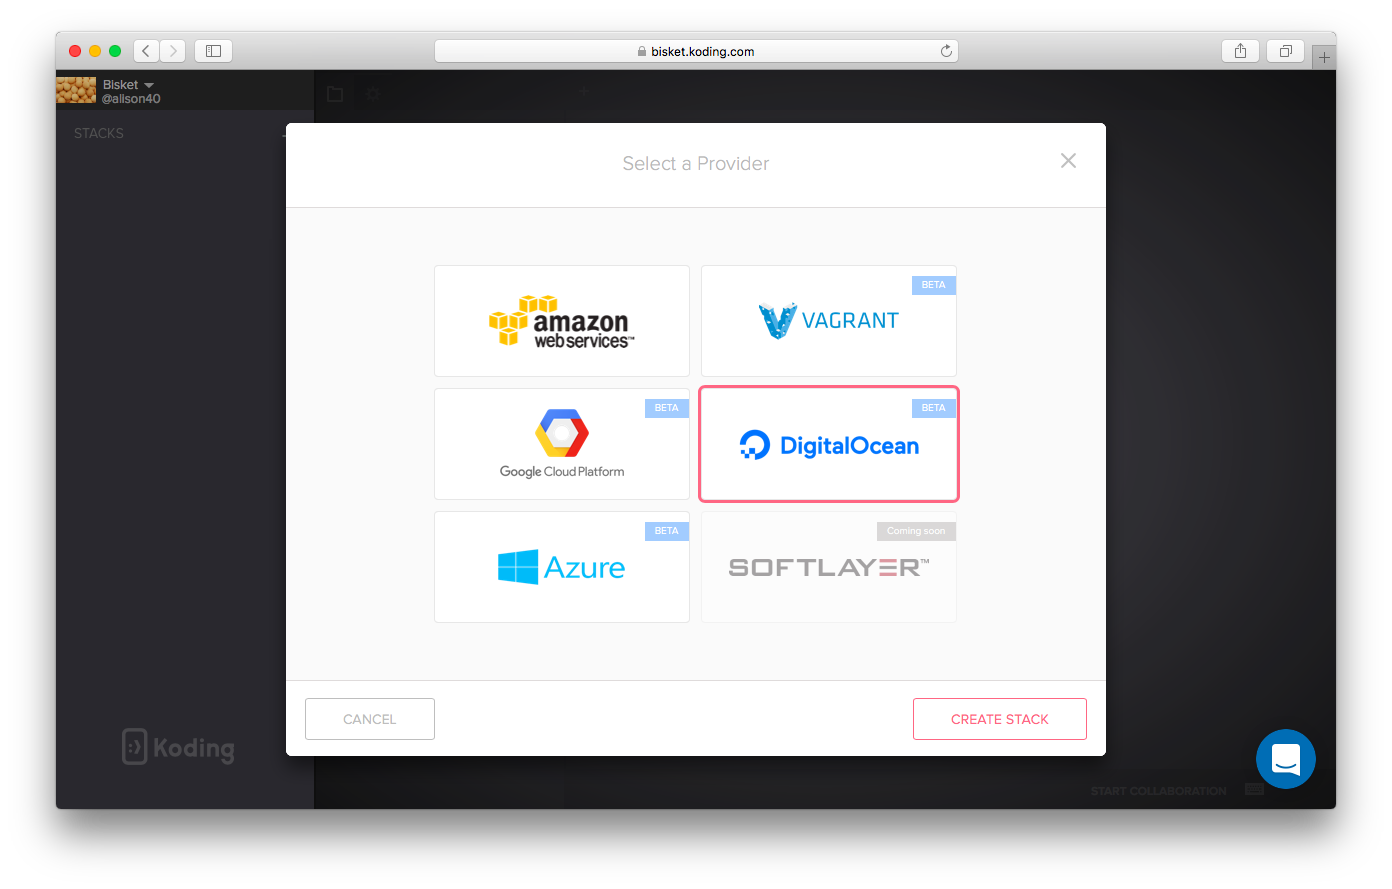
Choose Digital Ocean and click Create Stack
-
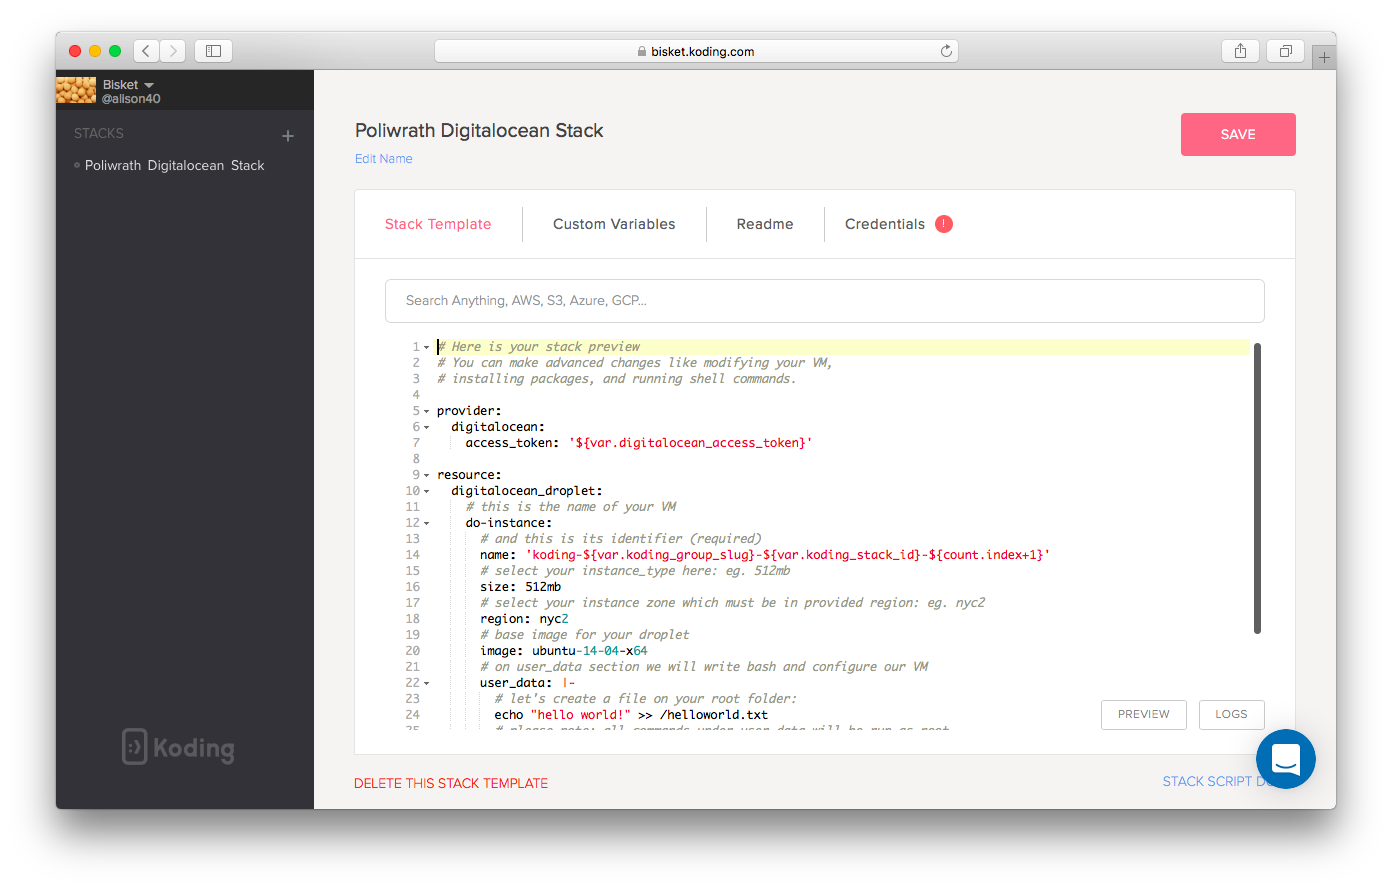
Your default Digital Ocean stack is now created (If you wish you can give your stack a name by clicking on Edit Name below your stack name). In this modal you will find four tabs:
- Stack template: This is your stack template
- Custom variables: to define custom variables which you can use within your stack template, values there are hidden from the non-admin team members
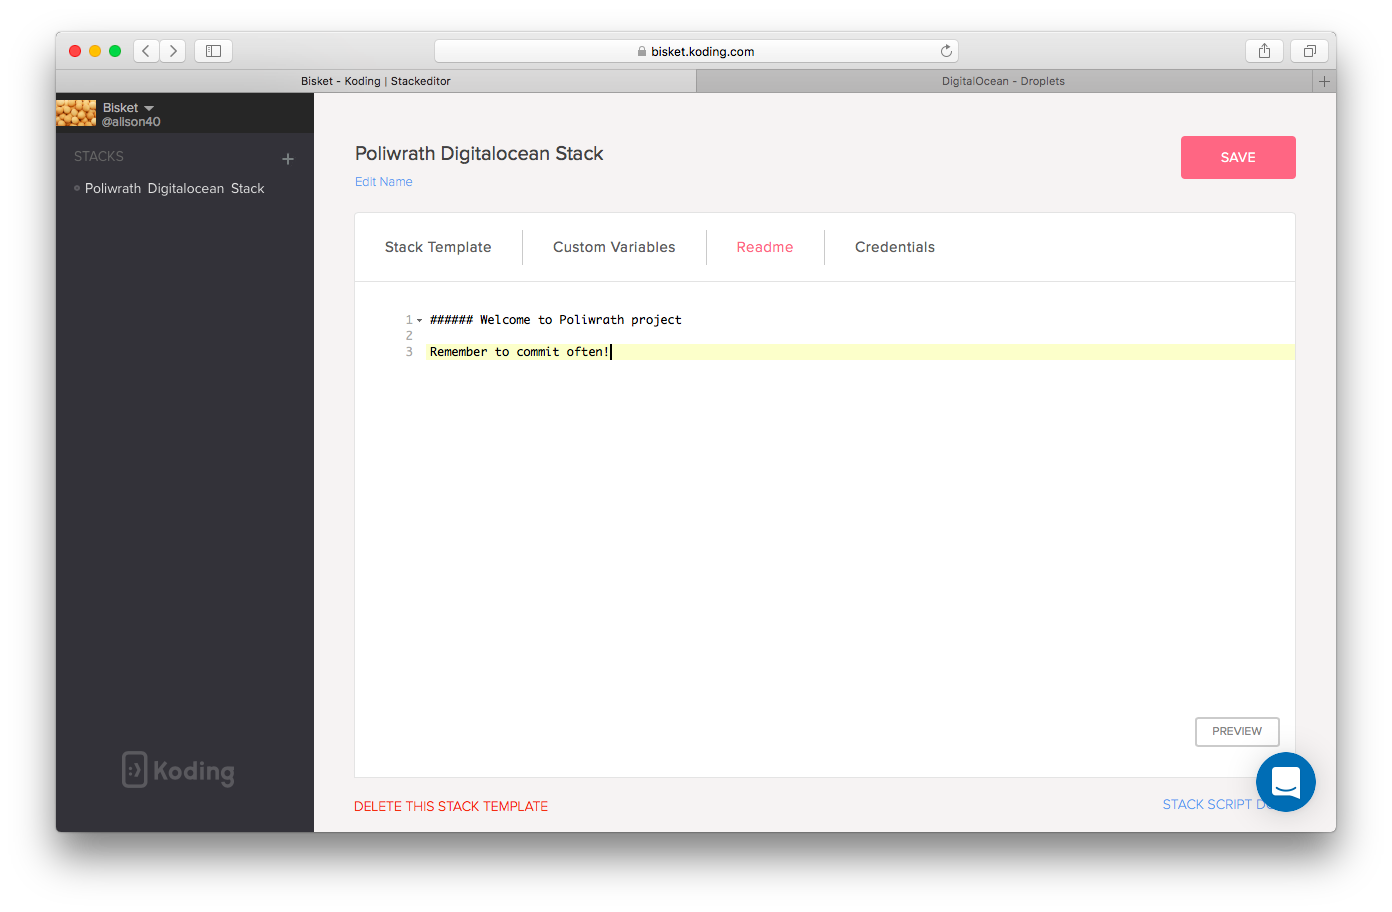
- Readme: This will be the text displayed in a message box when your team builds the stack
- Credentials: add your Digital Ocean access token here
-
Edit your Readme file to greet your team and provide them with information regarding your project or stack
-
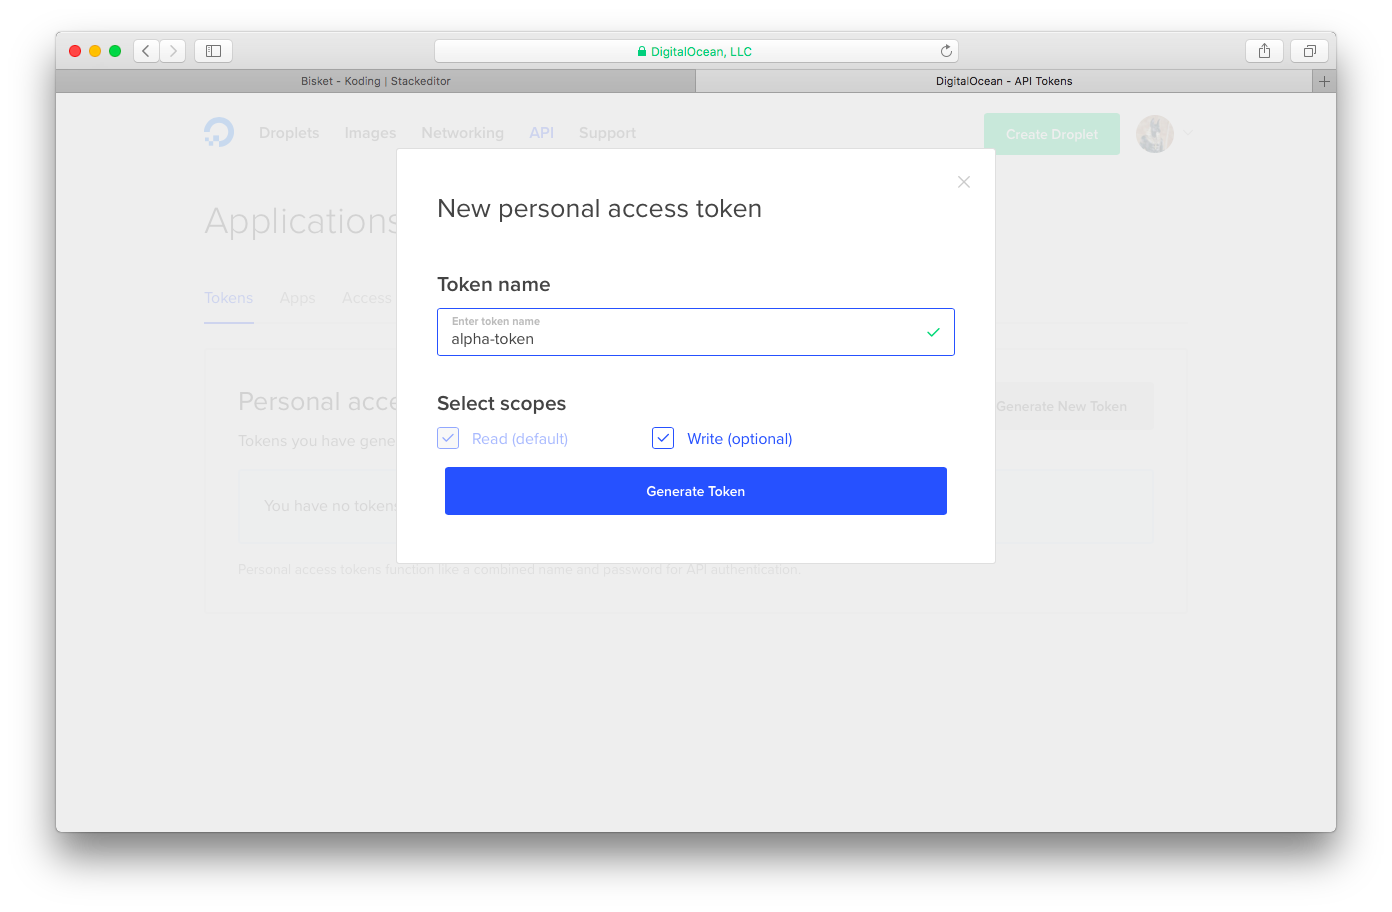
You need to add your Digital Ocean account access token to the credentials tab. To do that, login to your Digital Ocean account and go to API –> Tokens and click Generate New Token
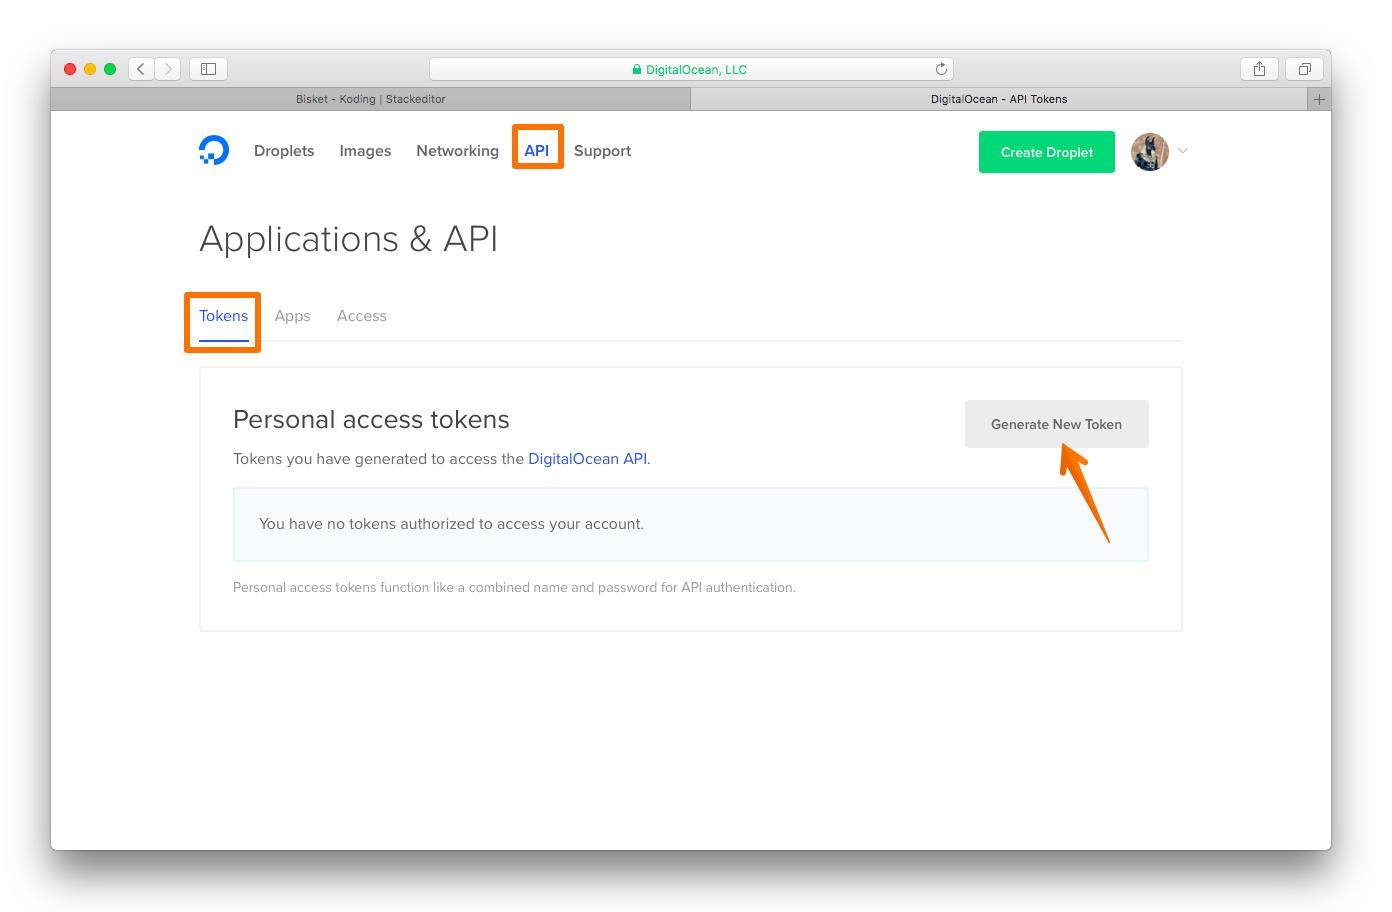
Give your token a title and click Generate Token
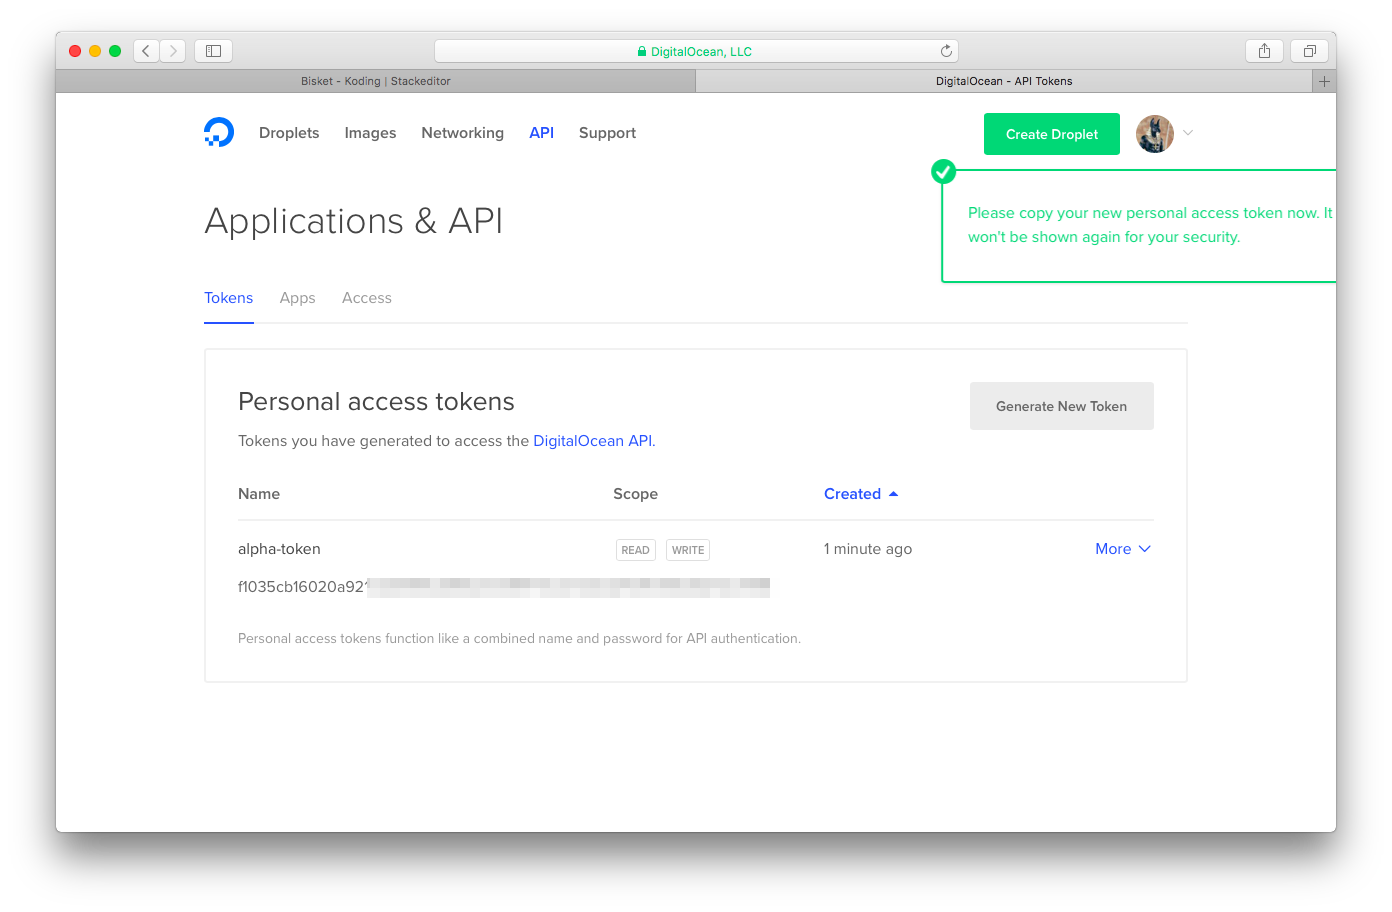
Make sure to copy your generated token, Digital Ocean will not show your personal token again!
-
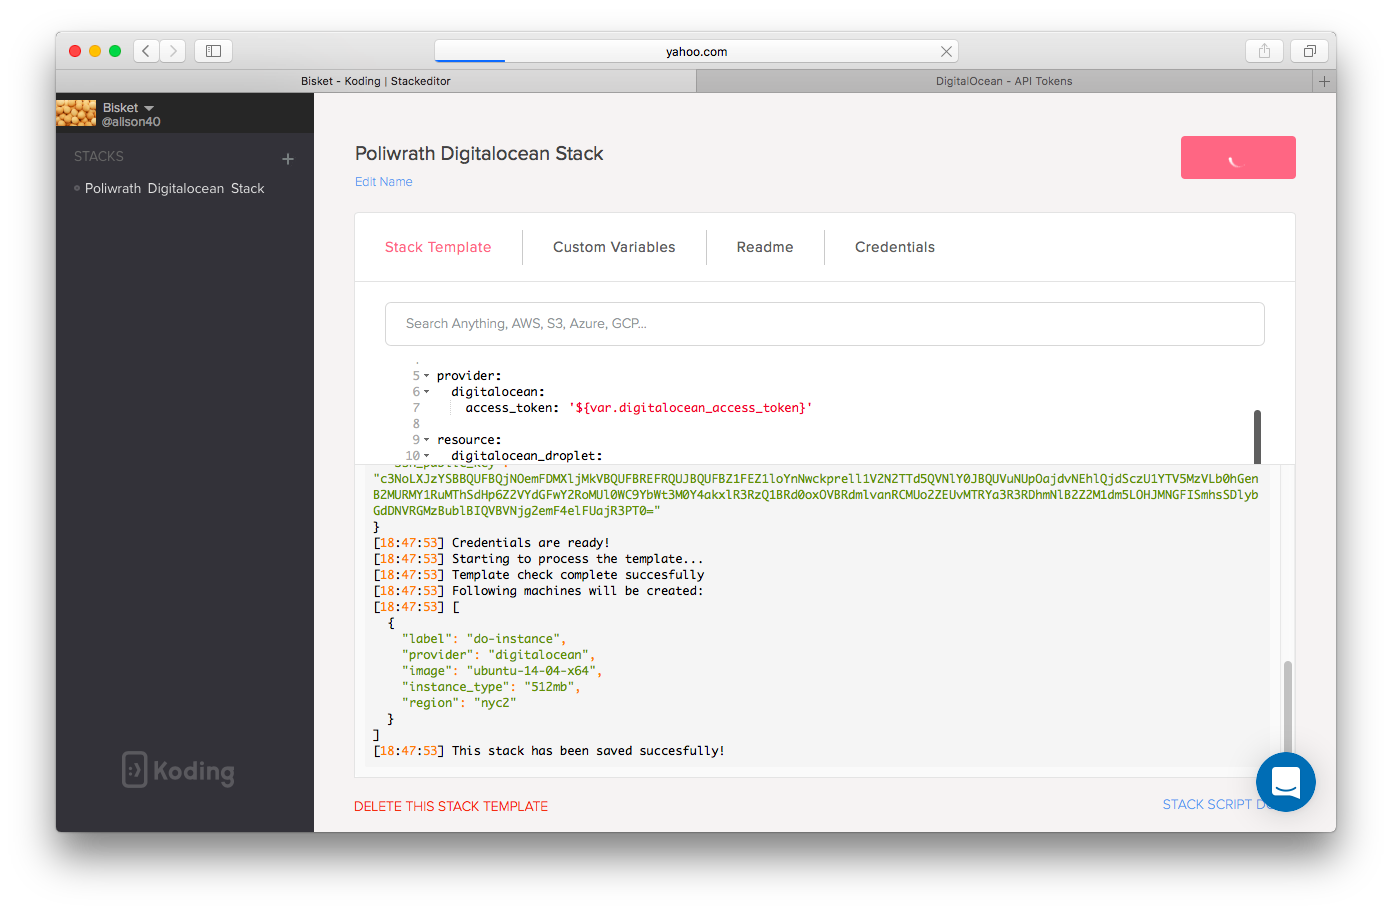
Go to your Credentials tab on Koding for Teams, give your token a title and paste your Digital Ocean Token in the Access Token field and click SAVE THIS & CONTINUE

-
Click Save on the top-right to save your credentials
-
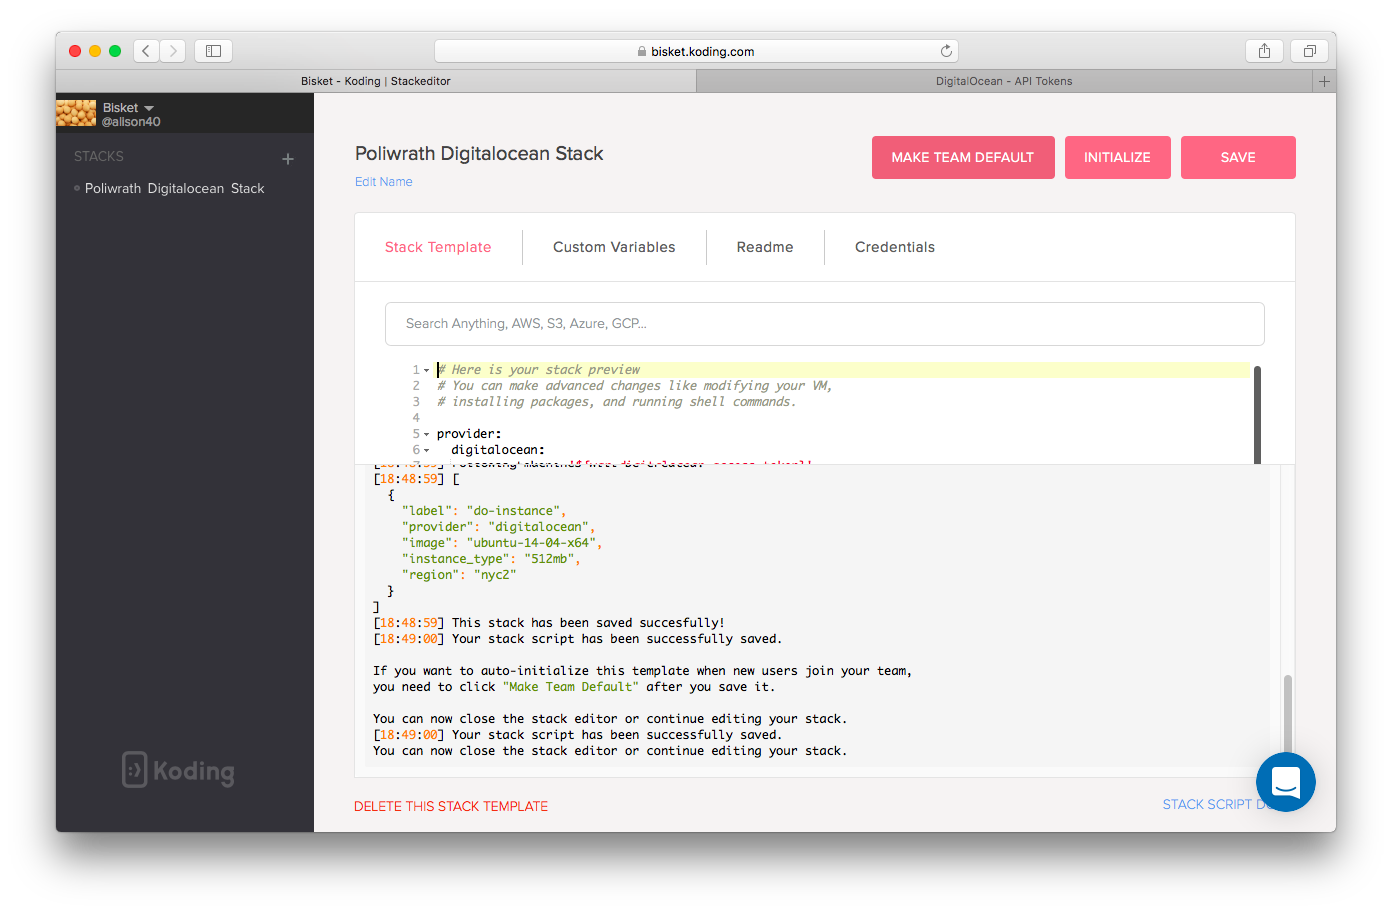
Click Initialize to initialize your stack
-
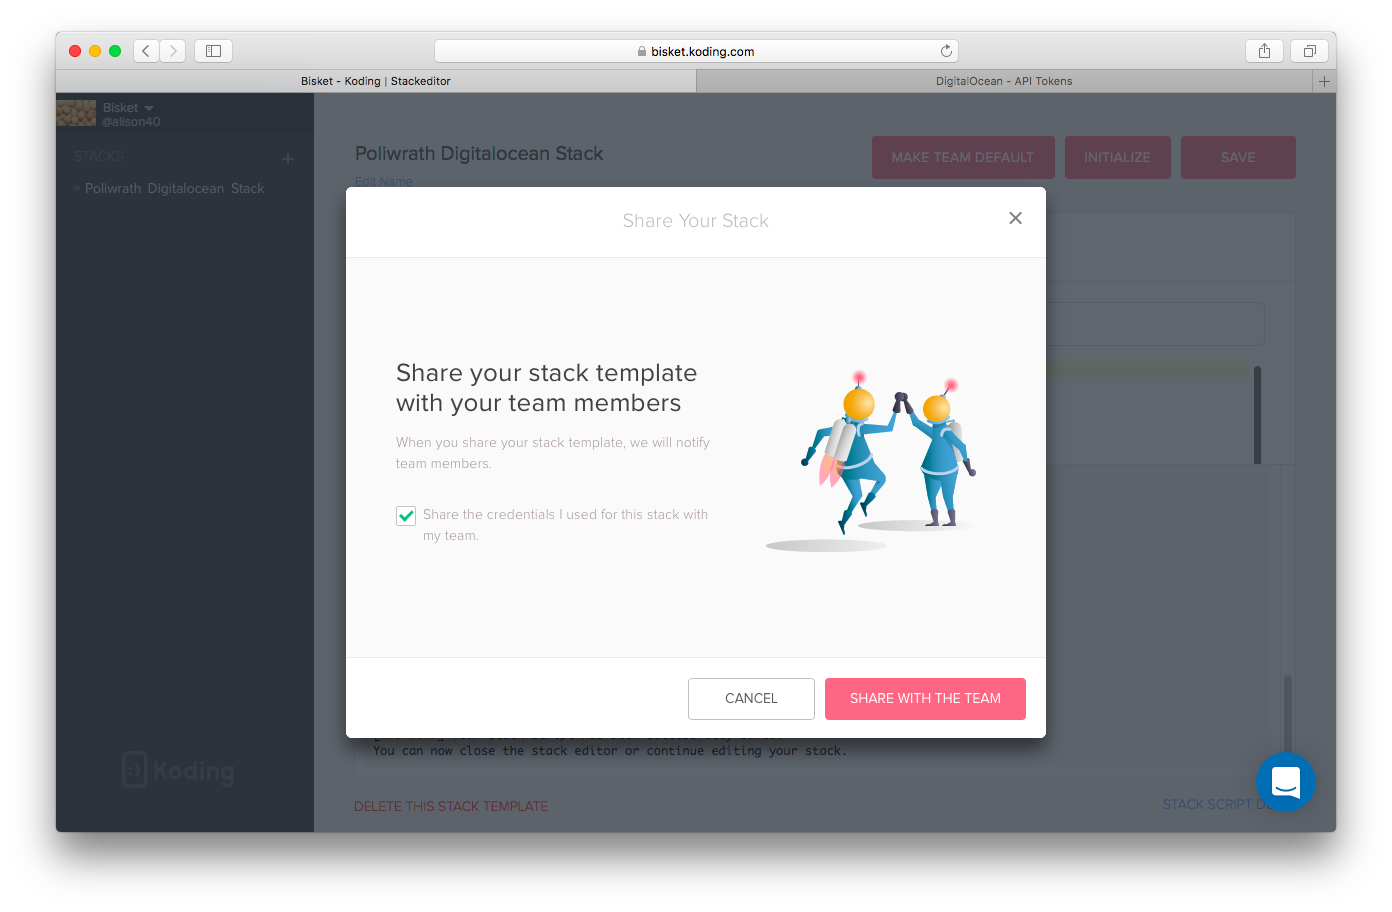
You can choose to share your own Digital Ocean Access Token with your team, this is useful in case you want to have all instances created by your team to be under your Digital Ocean account. If you agree, keep the “share the credentials” check box ticked, if not, make sure to uncheck this option. Then click Share With The Team to share your stack with your team.
-
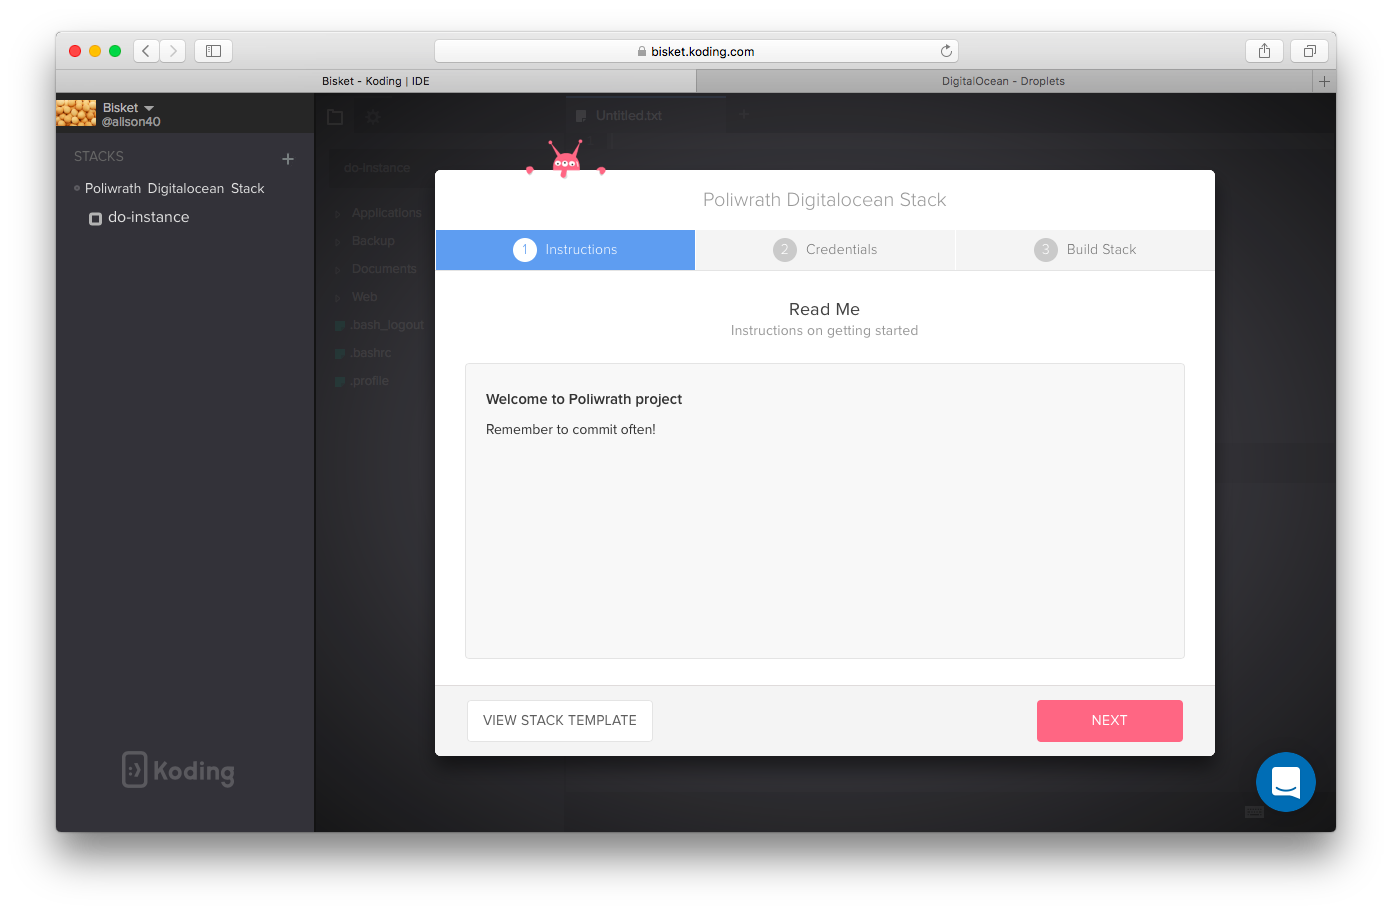
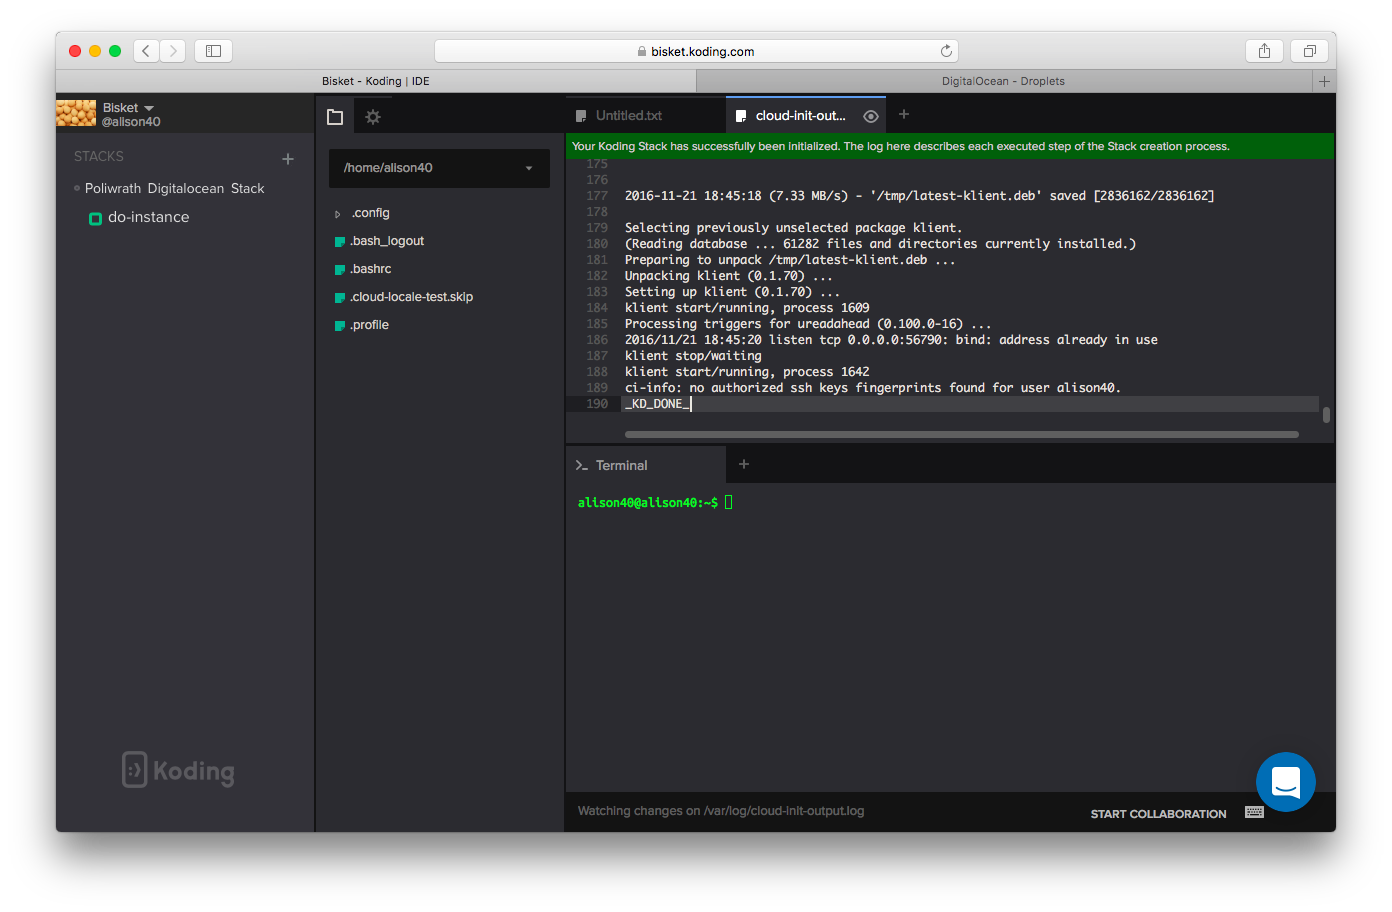
Now it’s time to build our VMs. You will see a message displayed in the Build Stack window, this is what we earlier added to our Readme tab when creating the stack. Click Next
-
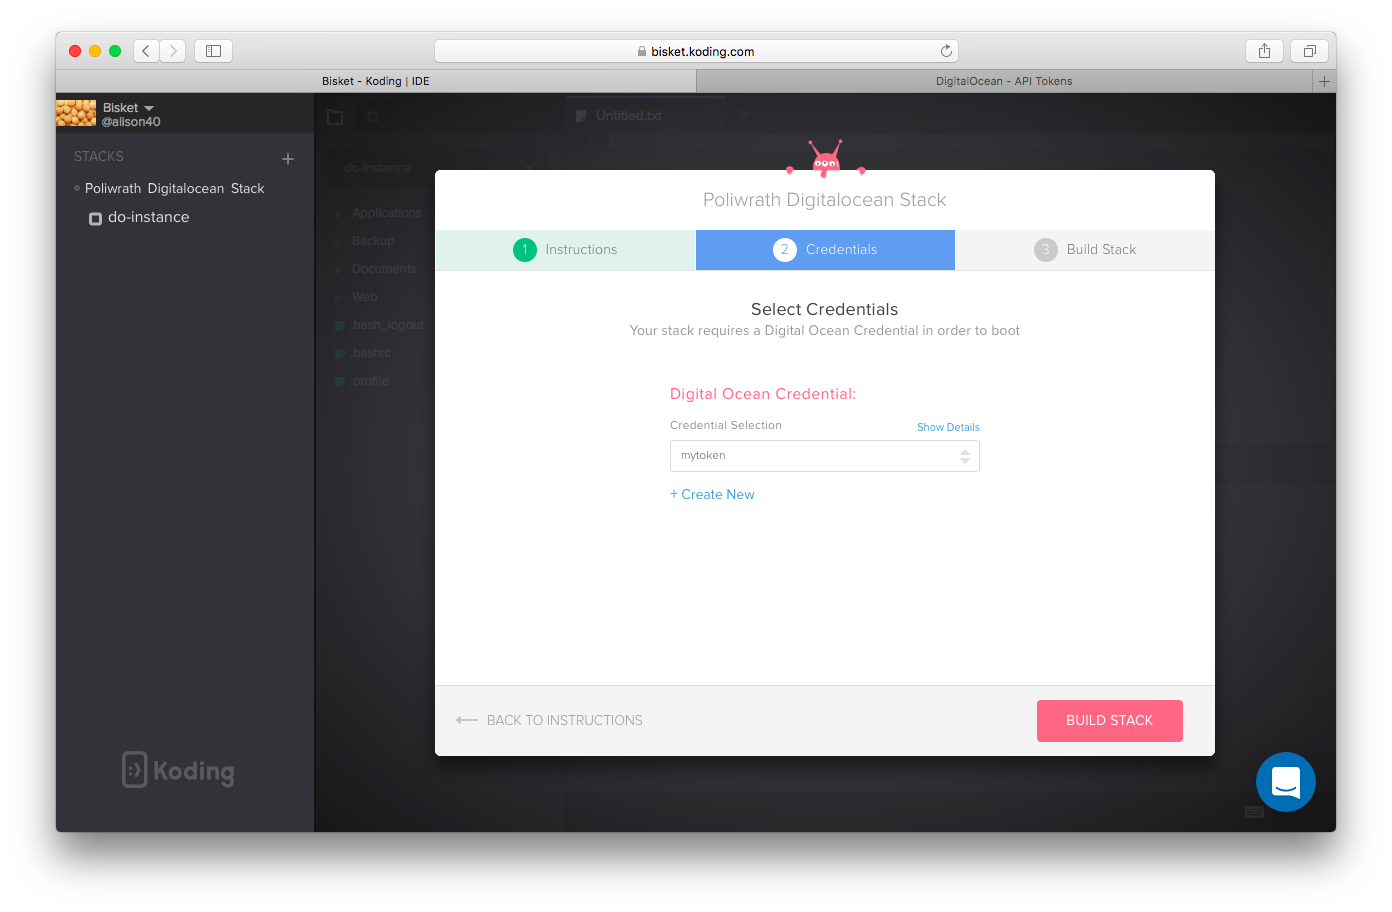
Make sure the correct token is chosen (you can save multiple access tokens) and click Build Stack
-
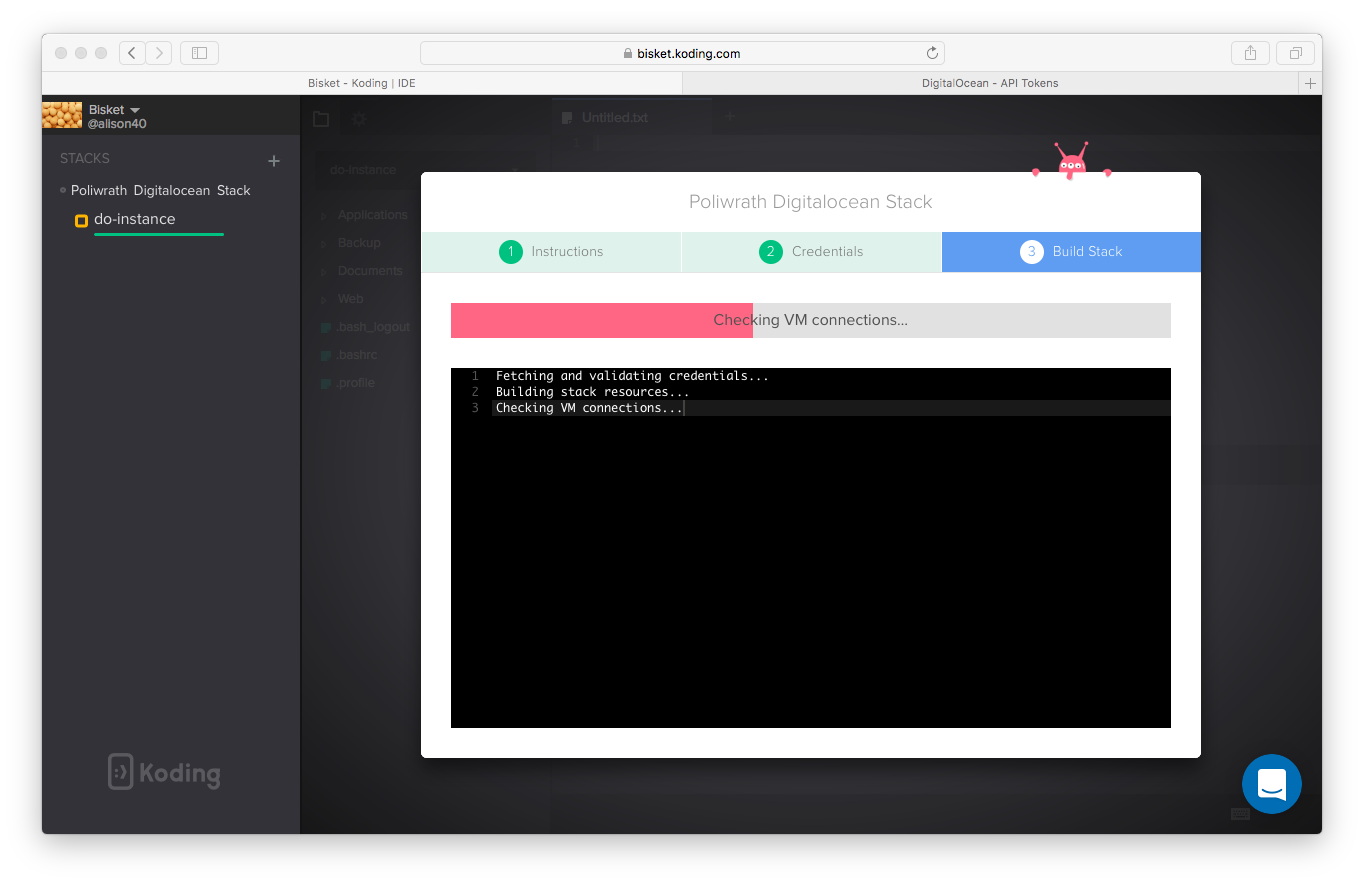
Your VM will start building..
-
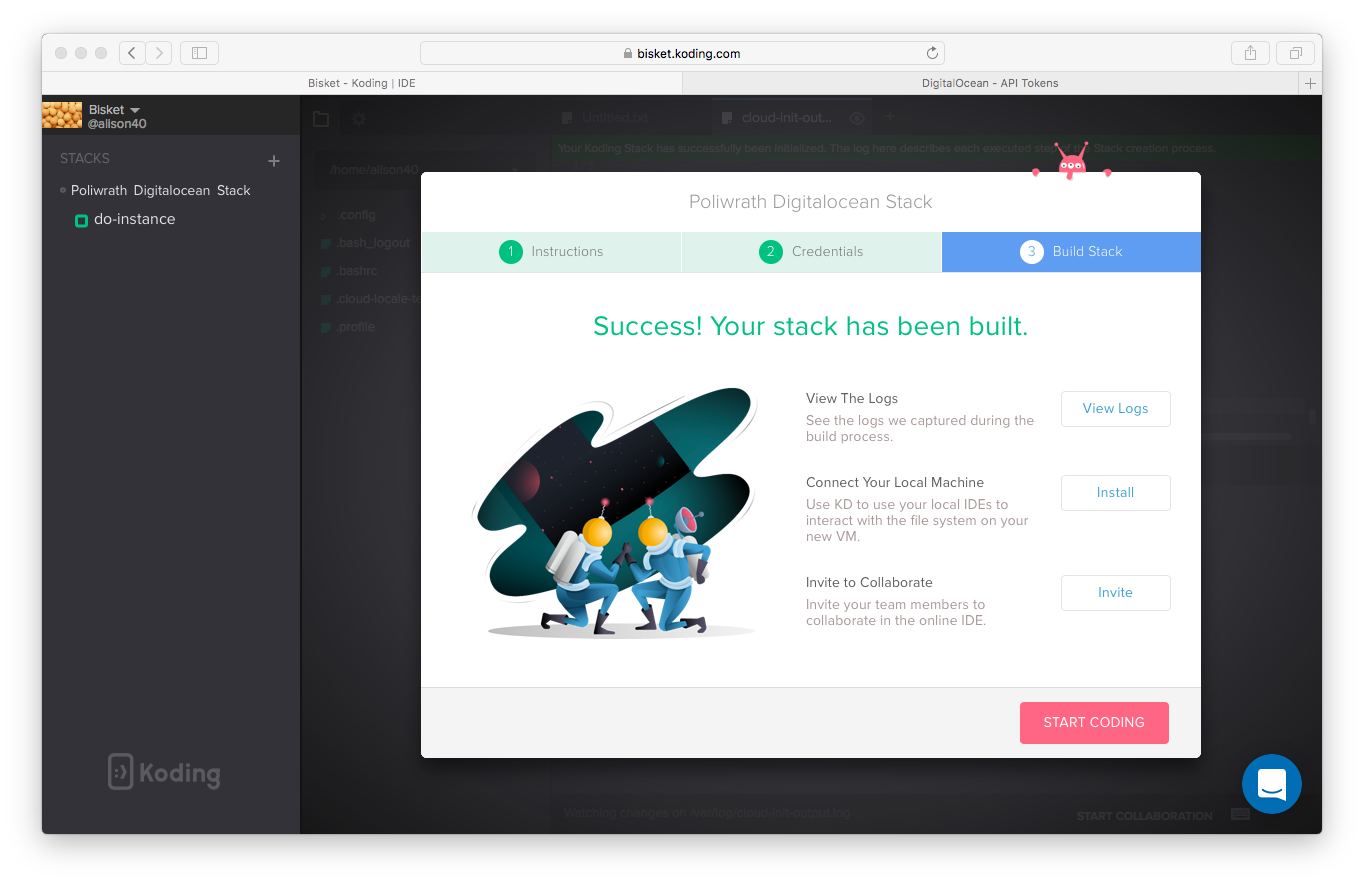
Click Start Coding to begin using your VM
-
Congratulations, your Stack was successfully built and you can now use your new VM!
-
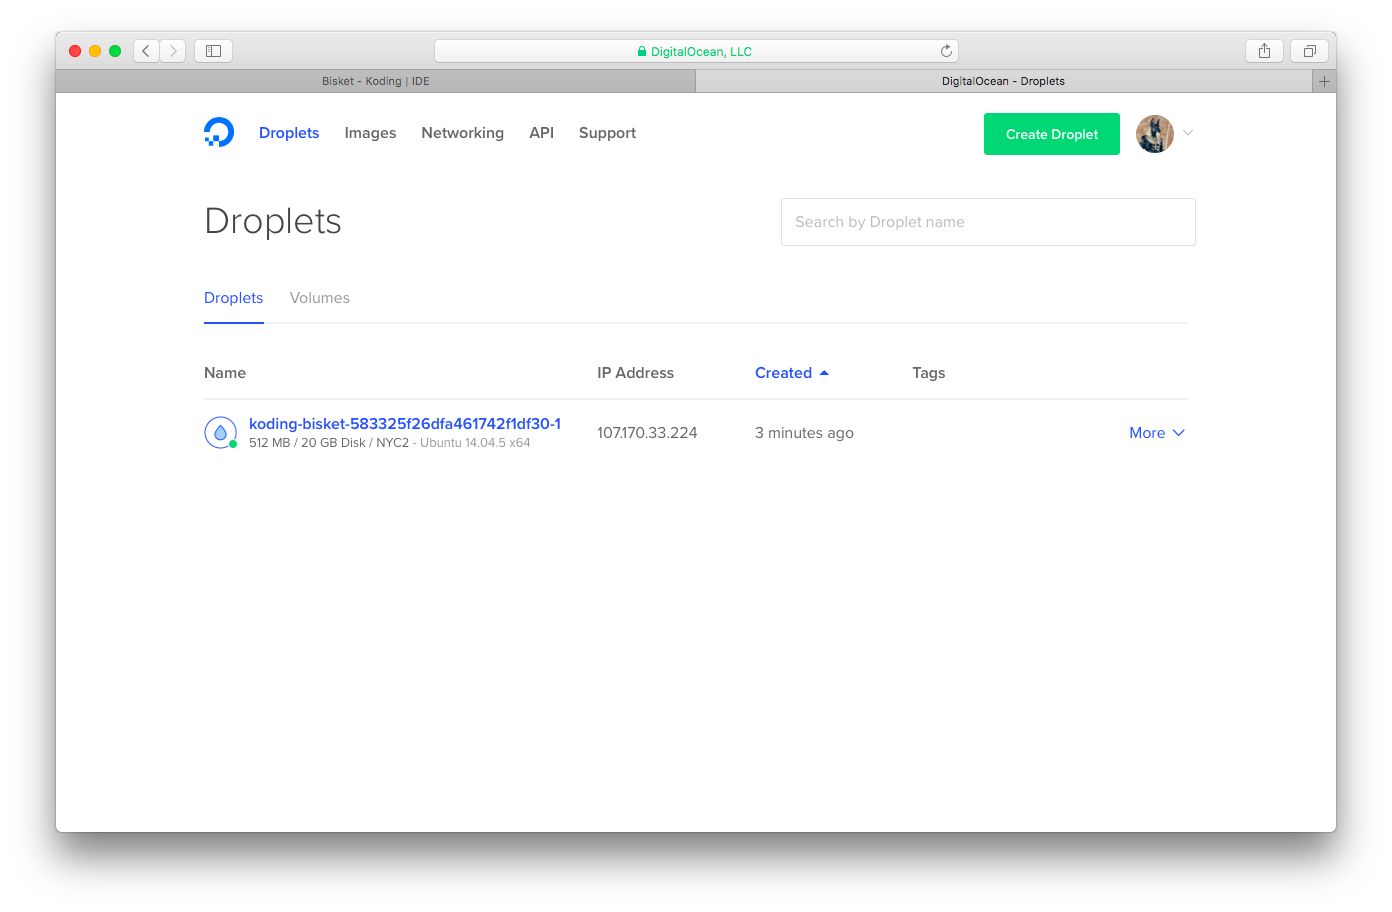
If you check your Digital Ocean account, you will see the new VM under your droplets.
This is the default stack template for Digital Ocean stacks
# Here is your stack preview
# You can make advanced changes like modifying your VM,
# installing packages, and running shell commands.

provider:
  digitalocean:
    access_token: '${var.digitalocean_access_token}'

resource:
  digitalocean_droplet:
    # this is the name of your VM
    do-instance:
      # and this is its identifier (required)
      name: 'koding-${var.koding_group_slug}-${var.koding_stack_id}-${count.index+1}'
      # select your instance_type here: eg. 512mb
      size: 512mb
      # select your instance zone which must be in provided region: eg. nyc2
      region: nyc2
      # base image for your droplet
      image: ubuntu-14-04-x64
      # on user_data section we will write bash and configure our VM
      user_data: |-
        # let's create a file on your root folder:
        echo "hello world!" >> /helloworld.txt
        # please note: all commands under user_data will be run as root.
        # now add your credentials and save this stack.
        # once vm finishes building, you can see this file by typing
        # ls /
        #
        # for more information please click the link below "Stack Script Docs"